The Report Manager has about 150 options for configuration of product catalogue templates (how to open the Report Manager).
This article focuses on personal configuration of product catalogue templates.
The following problem can be solved: you have selected a product catalogue template, defined in the settings what shall be shown in your catalogue (description, bar code, etc.), but you are not satisfied with the automatic positioning of information sections and now you want to change it manually.
Here is one more example of such absurdity: you have a lot of additional features such as width, height, diameter, colours, etc. and a small description. But they automatically have similar field sizes under the photo. Or your product description is too long and auto-scaling makes the font too small and illegible. Or you have decided to place the parameter table on the right side of the photo and make the photo section smaller.
These personal requirements to your product catalogue template can be changed manually.
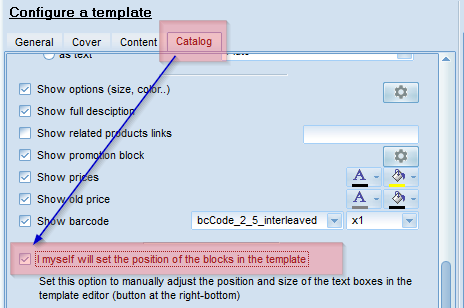
In order to prevent the program from automatic positioning of all sections, check the "I can set positions of sections in the template myself" box in the "Catalog" tab.

How to Make a Product Catalogue Template
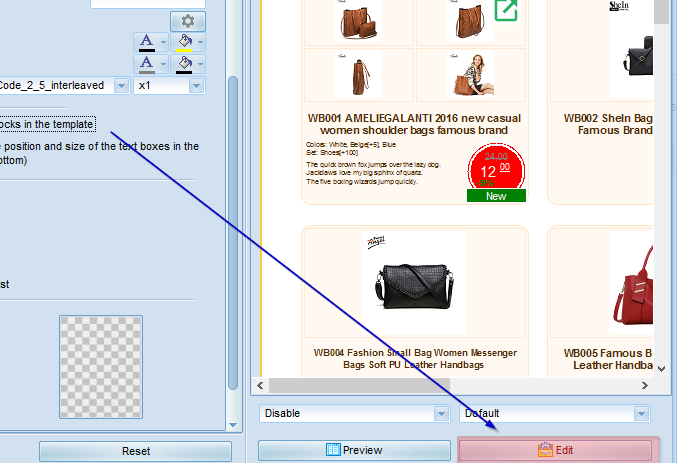
Click the "Edit" button in the bottom right-hand corner of the Report Manager window.

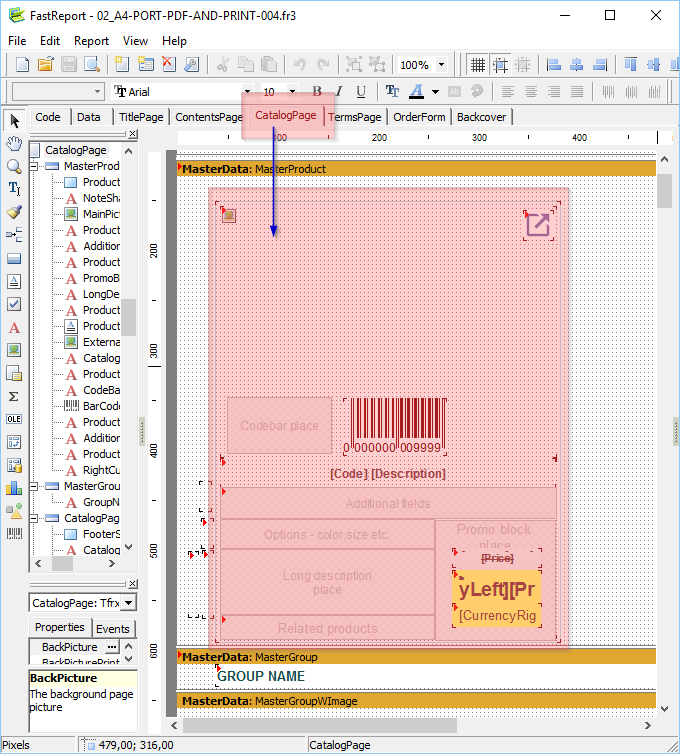
Click the CatalogPage tab in the appeared window. The product catalogue flypage template is located on the MasterProduct band. You can change the size and positions of sections according to your wishes with the following condition: you cannot place other text sections on top of the photo section, as the photo always stays on top (except link icons and bar codes).

Try to remain within the frame of the product flypage.
Do not change colours or fonts here, it is done in the template settings in the Report Manager and your changes will be ignored at the moment of catalogue creation.
Let us focus on information sections.
Picture. All product photos will be shown here
.
Link icon to an external resource
.
Codebar place - position of the bar code section
.
Code-Description
. This section shows the product code and name. Sometimes product codes are useless for your customers (though they are obligatory in the program).
To hide the code, double-click on the section and delete the [Code] text
.
Additional fields
. are all visible fields except code-description-price and special fields like bar code that are shown in a special way.
Options mean the displaying position of product options and attributes
.
Long description
. is a full description of products.
Related products
. are cross links to related products.
Promo block
. means displaying of the advertising section (advertising section templates are referred to below).
Crossed-out price is the old price
.
Price is the current price
.
Currency means the "currency on the right" sign. The "currency on the left" sign is shown in the price section (currency signs can be configured in the "General" tab of the Report Manager).
The price sections are located on the top of the Promo block, because they are mutually exclusive and do not overlap. You can drag unused sections to the right, they will not be shown, but do not delete anything!
The Master Group W/Image band is located below.
The band includes the group section template with an image. This section is shown when the Group Configuration function is turned on - Show Group Image in the "Catalog"
tab of the Report Manager.
You can change its design according to your wishes.
Below are 5 promo block template sections. There is one important requirement - the size of the promo block template must fit the size of the "Promo block" section on the Master Product band (above). Please do not forget about it, if you want to change the size of the Promo block.
But do not delete anything!
For example, if you do not need the discount calculation section and it is turned off, drag it to one side, because it will not be shown. Then you can change the size and position of other sections with no regard for this section.
If you have made a mess of your template, just close the editor and click on the restore button under the list of templates in the Report Manager.