Editing Product Lists in MyBusinessCatalog
Learn how to create, edit, and organize product lists in MyBusinessCatalog. This guide covers managing sections, adding products, importing data, and customizing attributes to build a professional and organized product catalog.
On This Page
Overview of Product List Editing
Editing product lists in MyBusinessCatalog is a key step in creating a professional and functional product catalog. This process involves adding, organizing, and customizing products and groups, importing data from external sources, and setting attributes to enhance the catalog’s usability. MyBusinessCatalog provides intuitive tools to manage your product data efficiently, whether you’re working with a small inventory or a large, complex catalog.
Benefits of Effective Product List Management
- Organized Catalog: Structure products into groups and subgroups for easy navigation.
- Efficient Data Entry: Use import tools to quickly populate your catalog from spreadsheets.
- Customizable Attributes: Add visual indicators like "New" or "Not Available" to highlight specific products.
- Flexible Editing: Drag-and-drop items, sort columns, and manage data with ease.
Accessing Edit Mode
To begin editing your product list, launch MyBusinessCatalog in Edit Mode. This mode allows you to add, modify, or delete products and organize them into groups. Follow these steps:
- Open Edit Mode: Start MyBusinessCatalog and select Edit Mode from the main interface.
- Select a Product Group: Choose the product group you want to edit from the catalog hierarchy. The product list for that group will appear in a table on the left.
- View Existing Items: If the group contains items, they will be displayed in the table. If empty, you can start adding new products.
Using the Product List Toolbar
The product list toolbar, displayed at the top of the product table, provides essential tools for managing your catalog. Here’s a breakdown of the toolbar buttons (from left to right):
- Save Product List : Saves changes to the product list. Changes are also auto-saved when exiting the program or switching groups.
- Expand List: Expands the product list to fill the entire window for better visibility.
- Restore List Width : Restores the product list to its default width.
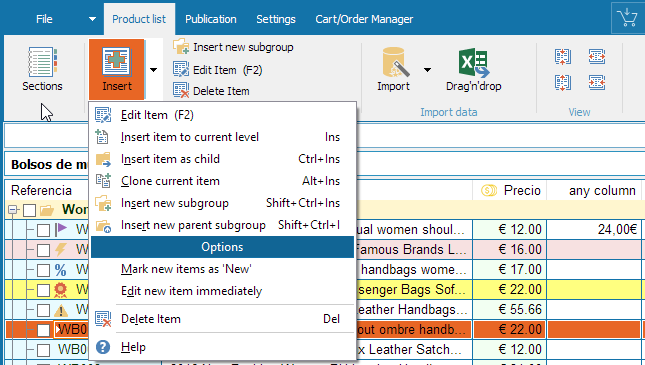
- Add New Item : Adds a new row for entering a product (use the Ins key, or Ctrl+Ins to insert as a child item).
- Delete Item(s): Deletes selected items. Hold Ctrl or Shift to select multiple items, or use the Del key.

Organizing Products and Groups
MyBusinessCatalog allows you to structure your catalog by organizing products and groups efficiently:
- Adding Products: Fill out the table with product details (e.g., name, price, description). Use the Ins key to add new items or the toolbar’s “Add New Item” button.
- Managing Groups and Subgroups: Groups and subgroups are treated similarly to products but should not have prices to avoid being added to orders as items.
- Moving Items: Right-click and drag items to a subgroup or reorder them within the list using drag-and-drop.
- Sorting: Click a column header to sort the list by that column (e.g., price or name). Alternatively, manually drag items to arrange them according to your preferences.


Importing Product Data
If you have product data in common formats like MS Excel, MyBusinessCatalog Gold allows you to import it quickly:
- Select a Product Group: Choose the group where you want to import data.
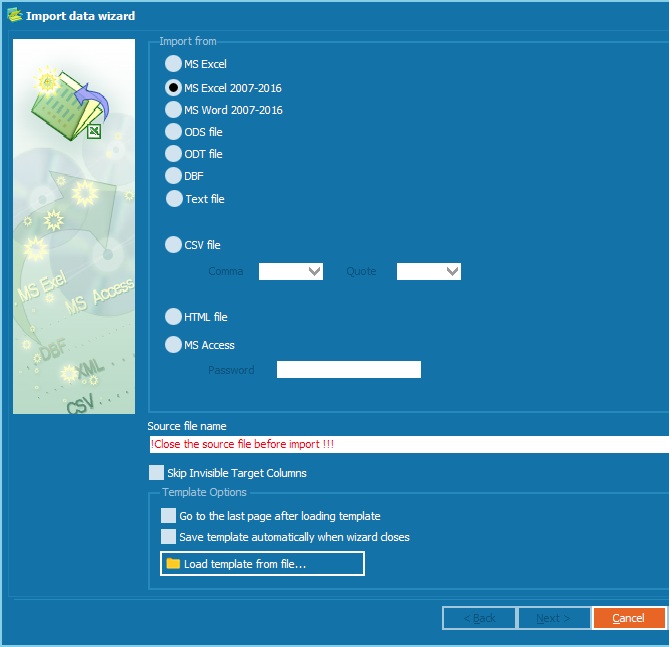
- Access the Import Wizard: Click the “Import” button in the toolbar or go to Service → Import Data Wizard.
- Follow the Wizard: The Import Data Wizard will guide you through mapping your spreadsheet columns to MyBusinessCatalog fields.
- Review and Save: Verify the imported data and save it to your catalog.

Learn more about importing data in our Import Data Wizard Guide.
Setting Product Attributes
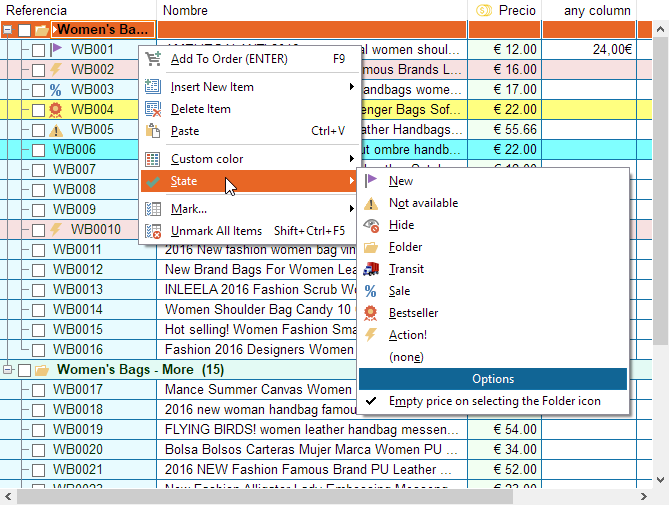
Enhance your catalog’s descriptiveness by assigning attributes to products or subgroups. Right-click an item, select the “State” option in the context menu, and choose from the following attributes:
- New: Marks new products to highlight recent additions.
- Not Available: Indicates items that are out of stock but should remain in the catalog.
- Hide: Hides items from end users while keeping them editable in Edit Mode. Use this for temporary removal.
- Folder: A decorative attribute for visually distinguishing subgroups.
- (none): Clears all attributes from the item.

Video Tutorials
Watch these tutorials for a step-by-step guide on editing product lists and managing catalog data:
Tutorial on working with sections, columns, and formatting.
Tutorial on managing product lists and attributes.
Related Topics
Explore additional features to enhance your catalog:
- Setting Currencies in the Product Catalog: Format prices and apply calculations.
- Conditional Formatting: Highlight key data with color-based rules.
- Adding Product Descriptions and Images: Enhance products with visuals and details.
- Import Data Wizard Guide: Streamline data entry with imports.
Your Product List Is Ready!
You’ve learned how to edit, organize, and import product data in MyBusinessCatalog. These tools help you create a professional, user-friendly catalog tailored to your business needs.
Ready to build your catalog? Start with our free trial to explore all features.
Ready to Build Your Catalog?
Create a professional product catalog with MyBusinessCatalog’s powerful editing tools. Start today with a free trial.