Create product catalog, quickly fill up catalog from your price lists created in Excel, Word, and other applications.
Creating product catalog using Drag&Drop
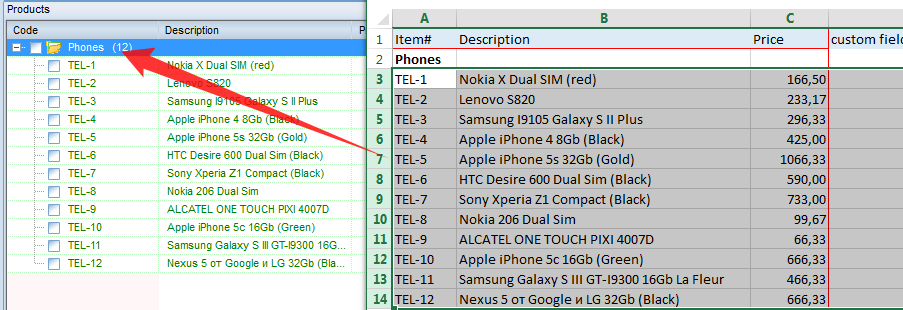
Creating a catalog has never been easier. Simply drag the products from your price lists to MyBusinessCatalog, and the program will generate the catalogs in various formats automatically!
The easiest way to add your products to the catalog is to simply drag them from your existing price list (Excel, Word, Open Office, etc.)
This action alone does not require any special skills or settings, but let us bring up a few thoughts that may help you fill up your catalog most efficiently.
When dragging, you can point the product insertion place on the list or in the folder.
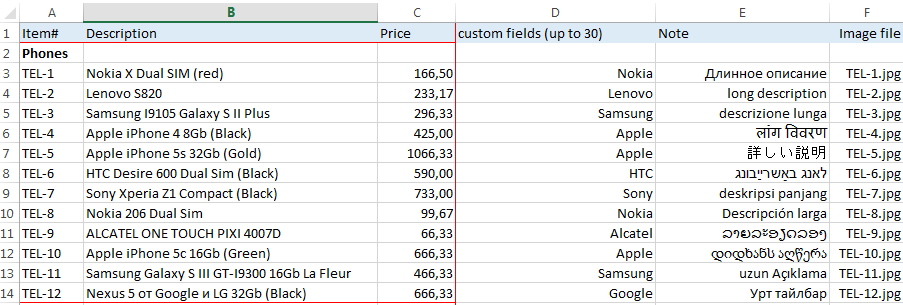
A mandatory and clear enough requirement is having in the proper order the first three columns: SKU-Name-Price.

An item without price with a name in the first or second column is treated as a group and automatically marked with the 'Folder' icon.


Having a unique non-empty SKU (SKU, ID, CODE) is highly recommended.More about SKU
Empty SKUs, when added, are automatically replaced with New - NNN.
Failing to comply with this rule may lead to obtaining duplicates with various SKUs like "New - NNN" when updating the product list later on.
![]()
If you don't use SKU numbers, simply set up a counter and use these new SKUs later on.
In case you drag and drop products currently existing in the catalog, they won't be added as new products; instead, the existing ones will be updated with new product details. The comparison is carried out by the SKU field.
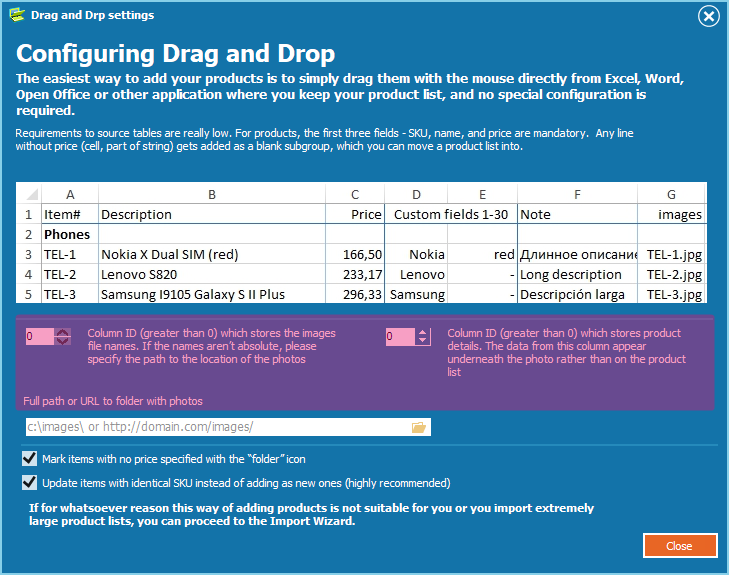
If your price list contains a field with a larger product description, it makes sense to specify
that column ID in the settings, and the data from that column will be placed underneath the photo rather than on the product list.


That large description field also undergoes a special parsing in printed, PDF, and Android catalogs.
To be able to add photographs, the price list must have a special column with the list of
photo file names. In the settings, specify the ID of that column and the folder or the URL for publishing the photos (if the location is not absolute in the price list).
Once the products are added, the program uploads the photographs in the background; the progress indicator is displayed at the bottom of the page. We recommend you to test out this feature on a smaller list (2-3 items), as an incorrect column specification or the location URL may initiate a lengthy but useless search of non-existing files.
Once completed, open the group section, give the new columns meaningful names, set up the appearance of the fields - in the product list, product profile, and the gallery.
You have entered information on your products. The application is now ready to create catalogs!
